
Start a Travel Blog for $3.95/mo!

This post may contain affiliate links.
Do you want to start a travel blog but don’t know where to start? Do you feel like you aren’t technology savvy enough? Maybe that you won’t have enough topics to write about? Or that no one is going to read your blog? I had all of these thoughts as well!
Travel blogging is a great way to keep a journal of your adventures, keep your family and friends in the loop, and learn valuable travel tips from other travel bloggers in the community. However, starting a travel blog is not a get rich quick scheme. It’s takes a lot of work to continuously write great content, keep up with social media, and make sure the blog itself is running smoothly.
Blogging is no longer a hobby for many, it can be a legitimate source of income! So what are you waiting for? Follow these steps below to start your own blog!
Table of Contents
Step 1: Find a Niche
What are you passionate about? Maybe, it’s a certain destination like Latin America or Australia. Maybe, it’s a certain type of travel like adventure travel or food travel. Whatever you choose to blog about, you have to distinguish yourself among the other travel bloggers out there.
Step 2: Sign-Up with BlueHost
To start a blog, you need a self-hosted WordPress platform and that’s why I chose BlueHost. They have excellent customer support to help you 24/7 and they host over 2,000,000 websites on their servers. They are the world’s largest WordPress hosting company and are trusted by millions of bloggers AND it only costs $3.95/mo to sign up!
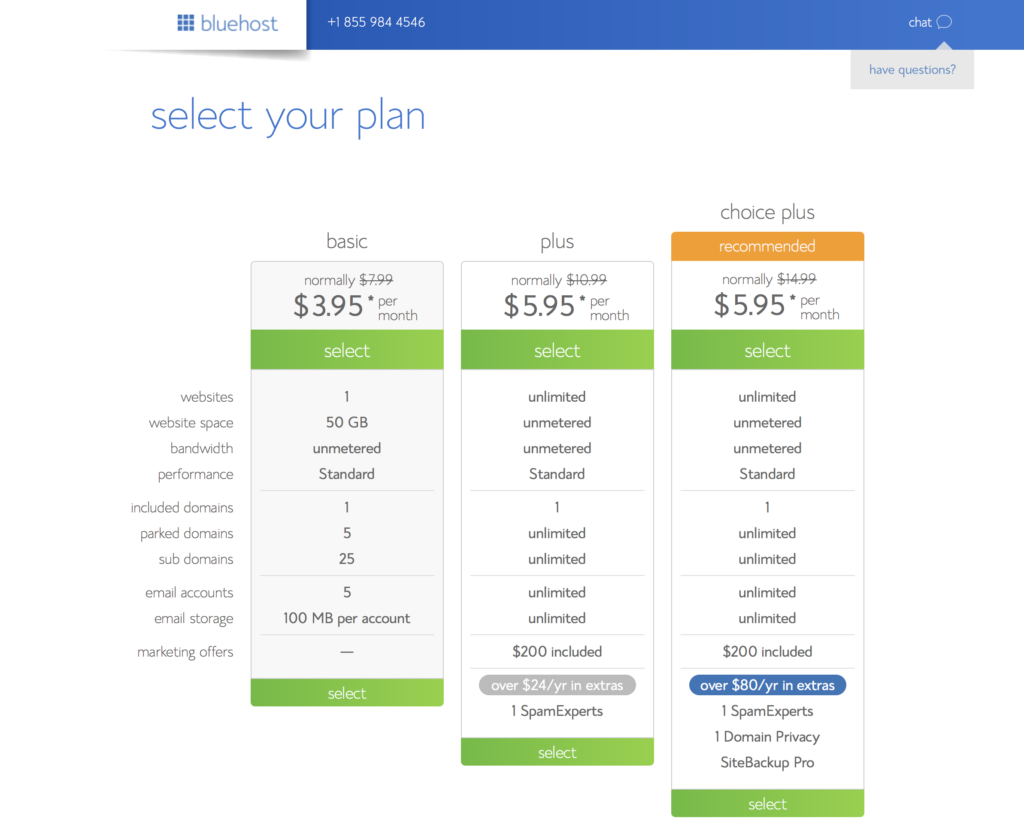
You will have three options:
If you’re on a budget, go with the Basic plan, it has everything you need for getting started. However, the Plus plan is definitely the best bang for your buck so if you have a little more to spend, go with the Plus plan.
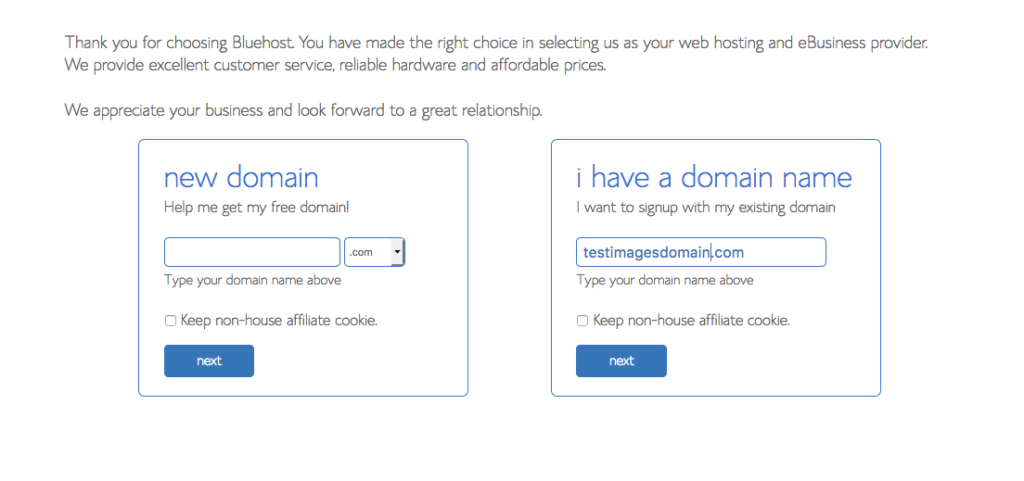
Step 3: Choose your Domain
Choose your domain. You will be able to select if you want to purchase a new domain or if you already have one. If you’re picking a new name, put some serious thought into what you want to call your blog. This will be your brand across not only your website, but social media as well. Make it something memorable!
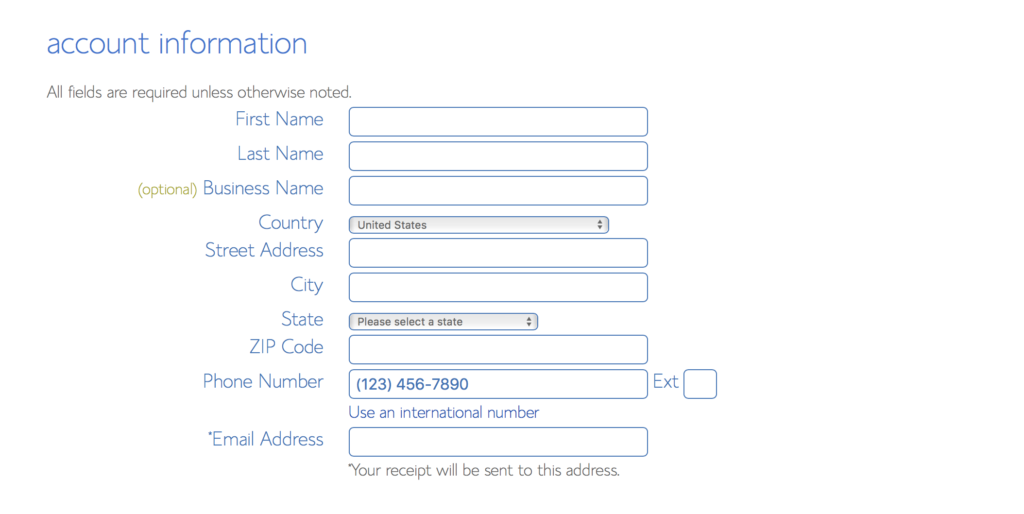
Step 4: Create your Account
Create your account and add your contact information. The only add-on I would really consider is the “Domain Privacy Protection” for $0.99/mo. This means your name associated with the domain will be kept private. If you chose the Plus Plan, the Domain Privacy Protection is included.
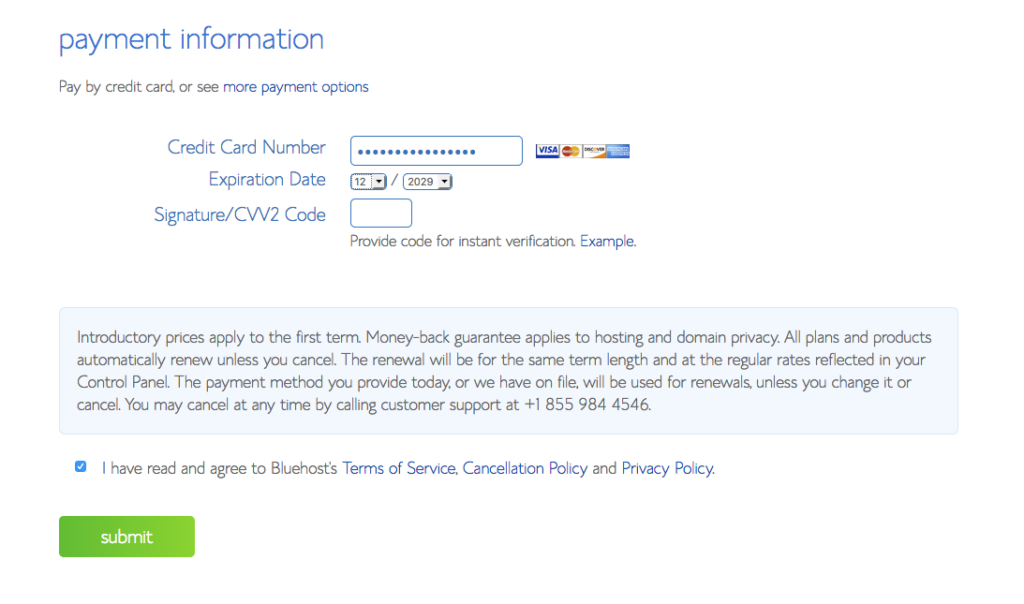
Step 5: Add Payment Information
Add your payment information. Just add your credit card and check that you agree to the terms and conditions and click Submit!
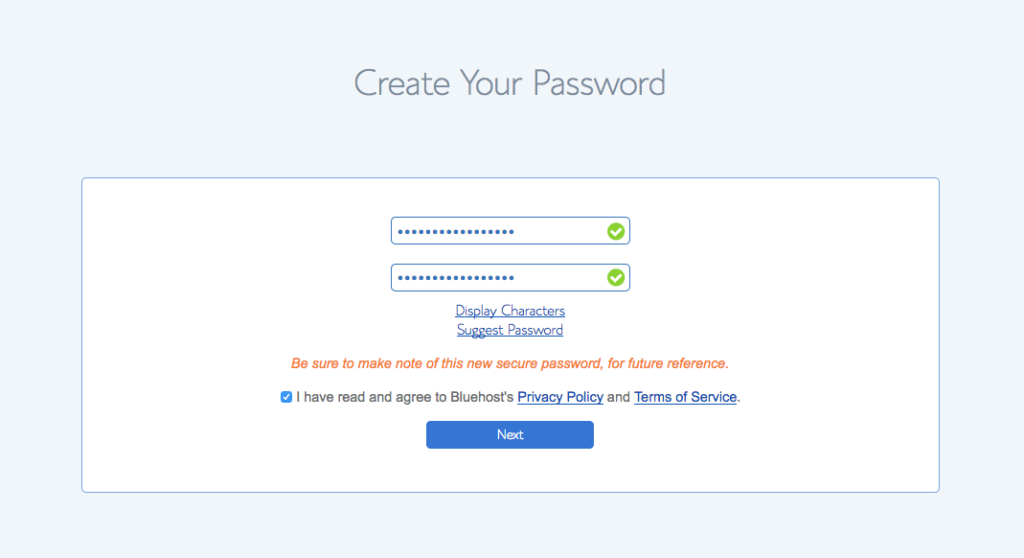
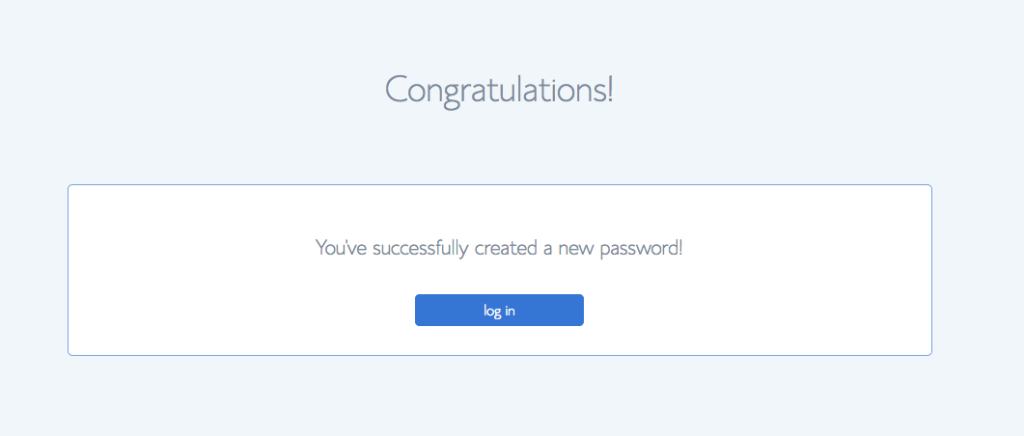
Congratulations – you just created a blog! You will be prompted to create a password for BlueHost and then you will receive e-mails reference both your BlueHost and WordPress accounts.
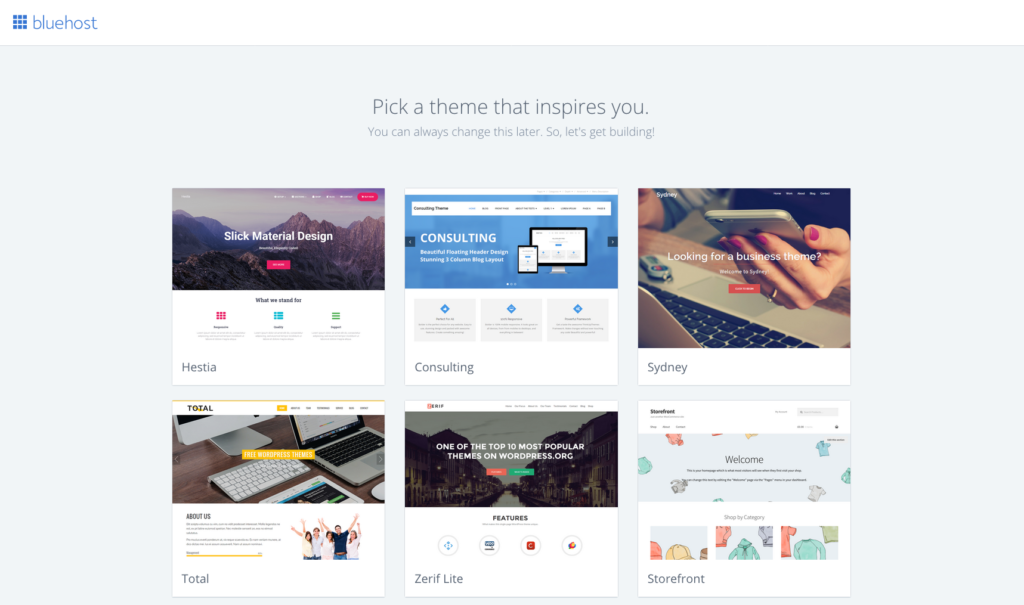
Step 6: Install WordPress
With a BlueHost account, WordPress will automatically be installed for you. All you have to do is log in and choose a theme. If you aren’t sure which theme you want, that’s ok, you can change it later!
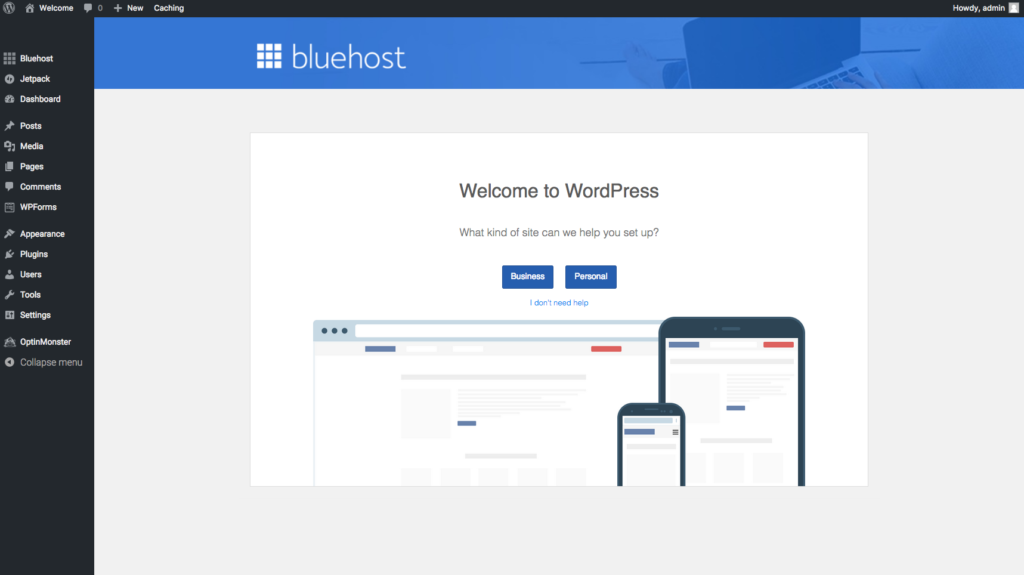
Step 7: Create Blog
The next screen will ask if you are creating a blog for business or personal reasons, if you are creating this blog to make money than you would check for business.
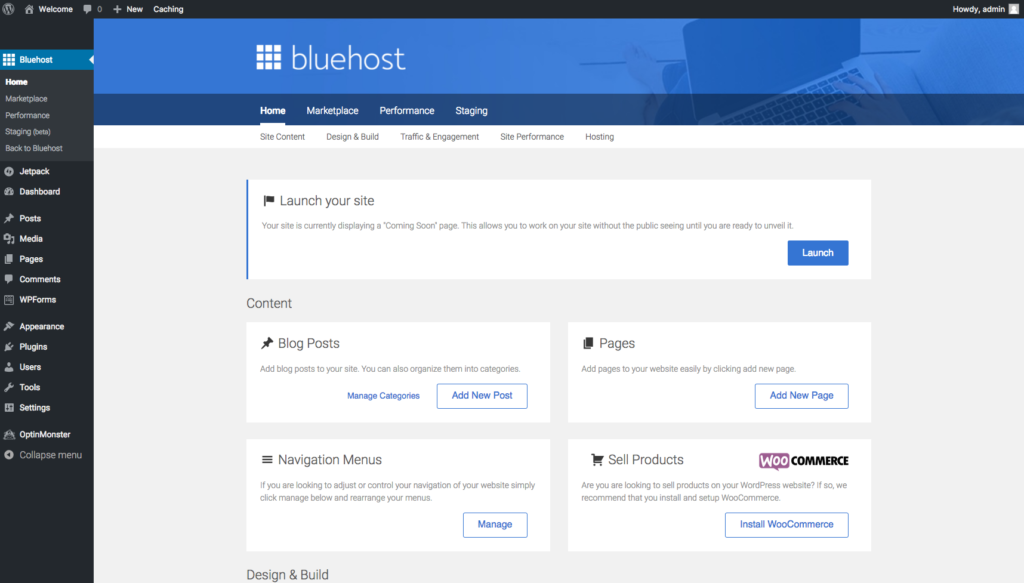
Step 8: Familiarize Yourself with WordPress Dashboard
Have a look around your WordPress dashboard, this is where you will create all the great content for your new blog! You can change your theme, play around with style settings, and upload photos.
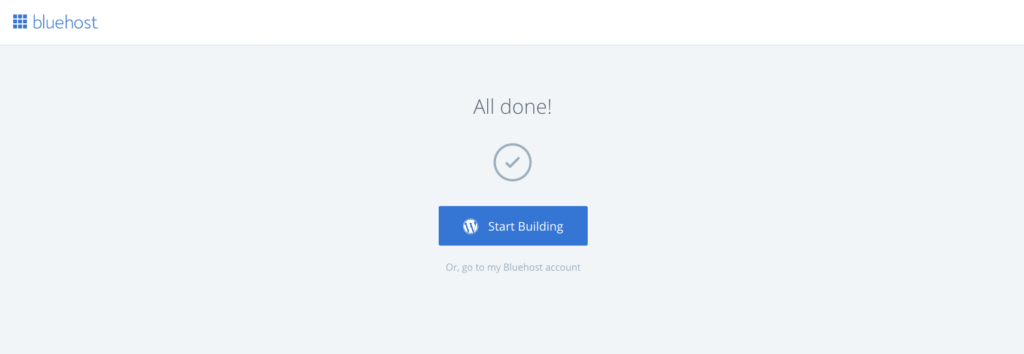
Step 9: Launch Site
So, now that you’ve taken some time and got your perfect theme, written a few posts, uploaded a some photos, you are finally ready to launch your blog! So go ahead and click that big blue button and show the world your blog!
If you have any questions, please contact me at jenn@thewanderlustcouple.com
Was this post helpful? Save it for later on Pinterest!